how to setup mail on your iPhone
Note:
This guide is compatible with iOS 7.1 and above

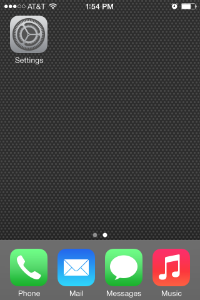
Tap Settings.
Generally, the Settings icon appears in one of your device’s main screens.
The Settings menu will appear.

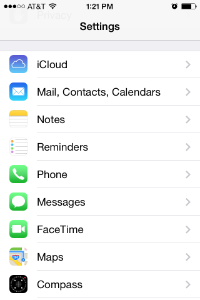
Tap Mail, Contacts, Calendars.
Tap Mail, Contacts, and Calendars in the Settings menu.
The Mail, Contacts, and Calendars menu will appear.

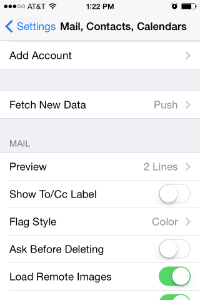
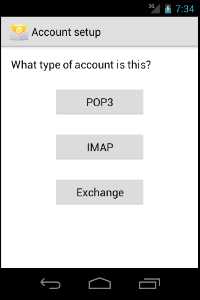
Tap Add Account.
Tap Add Account in the Mail, Contacts, and Calendars menu.
The Add Account menu will appear.

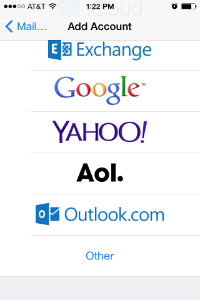
Tap Other.
Tap Other in the Add Account menu of mail account types.
The Other menu will appear.

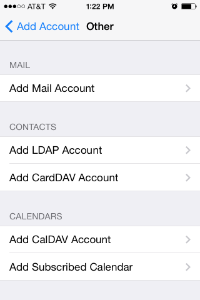
Tap Add Mail Account.
Tap Add Mail Account in the Other menu.
The New Account interface will appear.

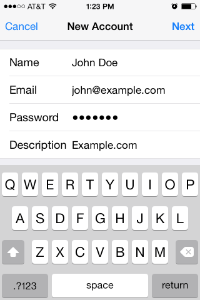
Enter your account information and tap Next.
Enter the following information in the New Account interface’s text boxes:
- In the Name text box, enter the name that you wish to use for the email account.
- In the Email text box, enter your email address.
- In the Password text box, enter the password for the email account.
- In the Description text box, enter a description for the email account.
Tap Next to proceed to the next screen in the New Account interface.

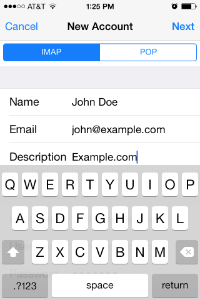
Select a mailbox type and verify information.
Use the toggle at the top of the screen to select a mailbox type.
Note:
Verify all of the information for your account, and then tap Next to proceed to the next screen in the New Account interface.

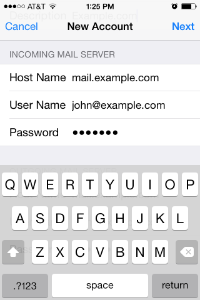
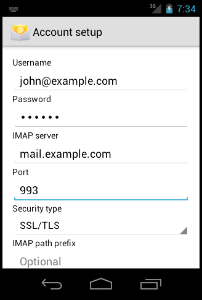
Enter information for your incoming mail server and tap Next.
Enter the following information in Incoming Mail Server text boxes:
- In the Host Name text box, enter the domain for the email account.
- In the User Name text box , enter your email address.
- In the Password text box , enter the password for the email account.
Tap Next to proceed to the next screen in the New Account interface.

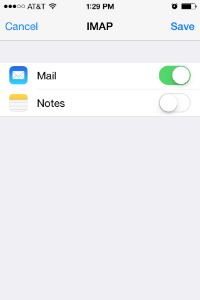
Disable the Notes toggle and tap Save.
Tap the Notes toggle to disable the Notes application for the account.
Then, tap Save to complete the account setup process.