
How to Stop Outlook 2016 From Moving Emails to Junk or Spam Folder
Method 1: Mark spam mail in the junk folder as ‘Not Junk/Spam’
The fastest way to prevent Outlook from sending legit emails to the junk folder is to tell it that the specified email sender is not a spammer. It will then add the email sender address to the trusted sender list. To do this:
- Get into the Junk E-mail folder.
- Select the email which you want to mark as Not Junk.
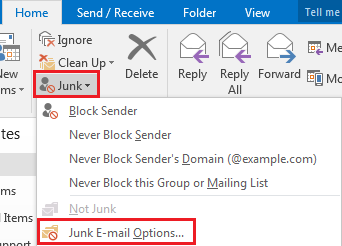
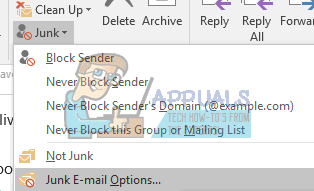
- Then go to the Home tab, click Junk and select Not Junk from the dropdown menu
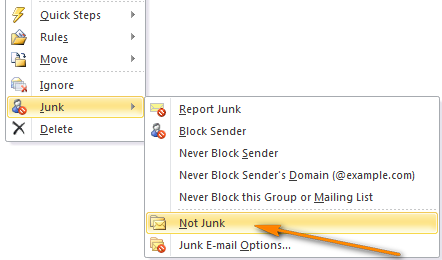
- Alternatively, after selecting, right click on the emails, go to junk and then click “Not Junk”
- After clicking Not Junk, a Mark as Not Junk dialog box will pop up, please check the Always trust e-mail from “xxx@xxx.com” box and then click OK.
Then the email will be moved to the original folder. And from now on, all emails sent from this sender will not be filtered to the junk email folder any more. You can also choose the “Never block this group of mailing list” and
Method 2: Create or add a sender email to the trusted sender list
You can add email sender’s address to the Safe Senders list to prevent email from going to junk folder.
- Select an email you want to add the sender to the Safe Senders list from the Junk folder.
- Right click it, and then select Junk > Never Block Sender in the right-clicking menu
- Then a prompt box will pop up to remind you that the sender has been added to the Safe Senders list. Click OK and this email address will not be filtered to the Junk folder from now on.
You can always set a trusted/safe sender manually by going to the Junk Email options from the Junk option in the home tab.
Method 3: Turn off automatic filter
Turning off automatic filter will ensure that all your emails go in through the inbox before you can delete them or send them to the junk folder.
- Click the Junk > Junk E-mail Options in the Delete group on the Home tab.
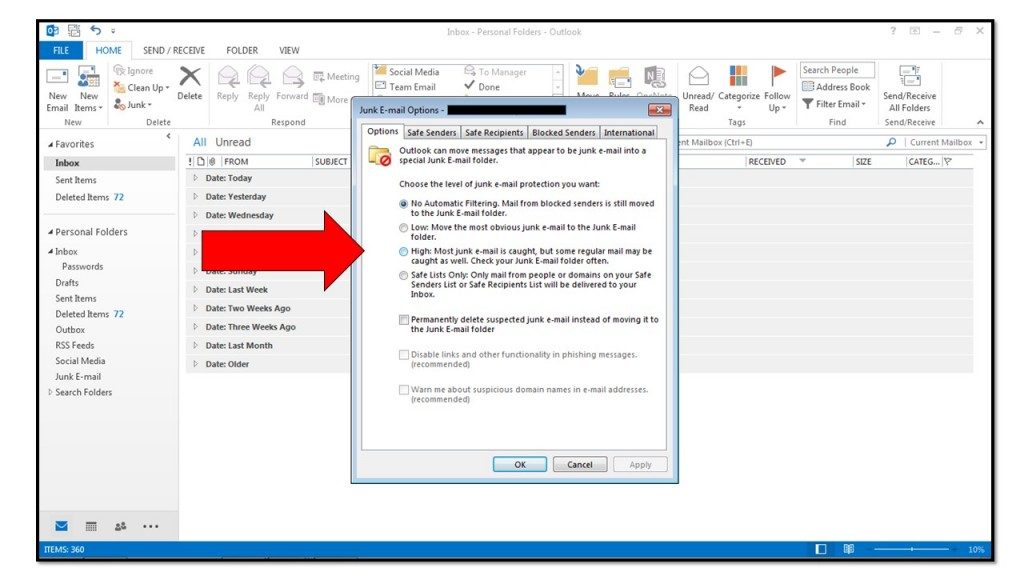
- In the Junk E-mail Options dialog box, go to the options tab.
- Check the No Automatic Filtering. Mail from blocked senders is still moved to the Junk E-mail folder option.
- Click OK
Now all email messages will be received regularly. However, those emails suspected to be spams by the server are still moved to the Junk E-mail folder automatically, but not the Inbox folder. Emails from blocked email accounts/sender are also sent to the junk folder. To clear the blocked senders list, follow the steps below.
- After step 2 above, click the ‘Blocked Senders’ tab
- Select all email addresses in the email list box (or those you want to remove from the list), and click the Remove button.
- Click OK

Now it won’t filter blocked sender emails sent to you, and all received email messages will be listed in the Inbox folder automatically.
If your spam/junk email rules are not holding properly, you might want to install the update from Microsoft that fixes the bugs and gives better definitions.


