How to Create a Subdomain

How to Create a Subdomain

When you create a subdomain in cPanel, you will be asked to choose the name of the subdomain, the domain the subdomain is for and the location from which the new subdomain will load it’s content.

We do have a video tutorial which will show you how to create a subdomain in cPanel.

Note: Some subdomain names are reserved: mail, www, ftp, cpanel, whm, webmail, webdisk. You can use any name except these.

How to Create a Subdomain

  1. Log into cPanel.
  2. In the Domains section, click on the Subdomains icon.
  3. In the Subdomain field, select the name of the subdomain you wish to use. For example, if you choose blog, your subdomain will be:

    blog.example.com

  4. In the adjacent drop-down menu, select the domain for which you wish to create this subdomain. You may create a subdomain for any addon domain or parked domain that already exists in your cPanel.
    Note: Addon domains automatically create a corresponding subdomain that reflects the addon domain and primary domain.
  5. Click on the Document Root field and it should automatically populate with a suggested location from which the subdomain will load it’s content.
    • For instance, if you chose “blog” as your new subdomain, then the Document Root field will populate with /public_html/blog. This means that the new subdomain will load it’s content from the folder named blog from within the public_html directory.
  6. Once all three fields are set, simply click Create to complete the creation of your new subdomain.

Document Root for Subdomains

If you have addon domains or parked domains for which you wish to have the same subdomain name but wish for those subdomains to load different content, then pay close attention to the Document Root field when creating a subdomain.

Why Document Roots Cannot be the Same

This is very important because if you create blog.hostgator.com and blog.seohosting.com on the same cPanel, but leave the Document Root as the cPanel suggested location, both of your blog subdomains will load from the same directory of /public_html/blog and you will not have separate content for each subdomain.

Furthermore, if you own several domains and wish to have a different blog set up for each domain that loads from the subdomain name blog, then you will have to change the document root of each domain that you set up.

How to Avoid Duplicate Document Roots

To avoid this issue, when you create your new subdomain, make sure you set the document root to something other than /public_html/blog; instead, set it to something like /public_html/blog1. If you have done this correctly, then you will have more than one domain using blog as a subdomain, but both subdomains will be loading separate content.

What is a Parked Domain? How Do I Create and Delete One?

What is a Parked Domain? How Do I Create and Delete One?

Parked domains are often used by businesses that want to have more than one web address for advertising purposes. Parked domains are additional domains hosted on your account which display the same website as your primary domain and share web statistics as well; however, you can give the parked domain its own email boxes.

For example, if you own domain1.com and it is the primary domain of your cPanel account, you can set up domain2.com as a parked domain and it will load the content of domain1.com. When you visit domain2.com, you will notice that although the content of domain1.com is loading in the browser, the address bar will display http://domain2.com/. This is similar to a masked forward.

Domain Parking vs. a Parked Domain

When domain registrars offer domain parking, they are offering to park your domain on their servers and direct traffic to a page of their choice. This is a good temporary solution if you don’t have a web hosting account, but it is very restrictive.

Add a Parked Domain

Domains must be registered with a valid registrar before they can be parked. In addition, a domain will not be functional unless it is configured to point to the same name servers as your primary domain.

To add a parked domain to your account:

  1. Log into cPanel.
  2. In the Domains section, click the Parked Domains icon.
  3. Under Create a New Parked Domain, enter the domain name you would like to park on top of your primary domain.
  4. Click Add Domain.

You have just added a parked domain.

Remove a Parked Domain

To remove a parked domain from your account:

  1. Log into cPanel.
  2. In the Domains section, click the Parked Domains icon.
  3. Under Remove Parked Domains, find the domain you wish to remove.
  4. In the Actions column for that domain, click Remove.

To learn more about the difference between parked domains, addon domains and subdomains, please see the following article:

How to Log into cPanel

How to Log into cPanel

cPanel is a web hosting account management tool available on all NetNGN Linux hosting plans, including Shared Hosting.
You only get one username per cPanel. If you create addon, parked and subdomains, those domains can be accessed by logging in to your main cPanel; you will not have a separate cPanel or separate login credentials.

Note:

  • The username and password to log into cPanel can be found in your welcome email.

You can access your cPanel in any of the following ways, however option 3 is the most reliable as they rely on the server address and do not require your domain to be pointed at the server.

Notes:

  • Both your ServerName and your server IP address are provided in your Welcome email.
  • We always recommend using a secure connection. By using https along with the port address 2083 to access cPanel, your connection will be encrypted.

Option 1:

 (Be sure to replace yourdomain.com with your actual domain)

https://yourdomain.com/cpanel

Option 2: 

 (Be sure to replace yourdomain.com with your actual domain)

https://yourdomain.com:2083

Option 3:

 (Be sure to replace yourserverip with your actual domain)

https://yourserverip:2083

How to Install WordPress using Softaculous

How to Install WordPress using Softaculous

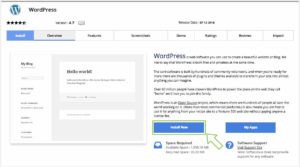
First, log into your cPanel account, click here to find out how, & locate the Softaculous installer as shown below & click the WordPress icon.


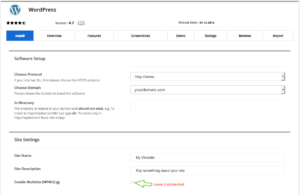
From here, you will have a few options to choose from. You will be able to select the domain to install WordPress on (if you have multiple addon domains) as well as the directory. If you want WordPress to be installed in a sub-directory, you can specify it in place of the “wp” shown in the directory field. This means you will go to http://yoursite.com/wp to view the WordPress site. If you want WordPress to be displayed in the root ie: http://yoursite.com, you would need to remove the “wp” from the directory field and leave it empty.

In addition to the above options, there are additional options that we recommend changing from the default settings:

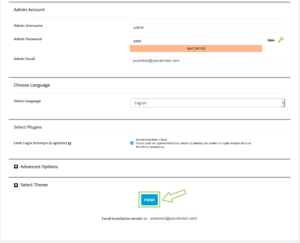
Username: Enter in a stronger username that is not easily guessed. For example, many hackers & malicious users know that most people simply choose “admin” as the default username. This means they now only have to guess the password.

Password: It’s also recommend to use a strong password with uppercase, lowercase, numbers & special characters. At least 10-15 characters is recommended.

Admin Email: Enter your email address.

Limit Login Attempts: For security reasons it is recommended to check this box.

Once all the details are filled, click the “Install” button and softaculous will begin the install:

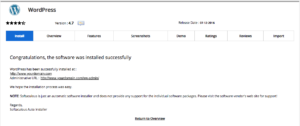
When the installer is completed you will see this window:

Congratulations, you have installed WordPress on your server!